I recently wanted to run Apache Airflow on my laptop as an upgrade to cron. I don’t really want all the full power and fury that Airflow brings, but I’m not one to shy away from killing a gnat with a sledge hammer.
I use conda to manage environments on my mac and I wanted to keep airflow in a conda environment. So I ran the following which sets up a conda environment called airflow then installs airflow in that environment.
## create and activate conda environment
conda create -n airflow pip setuptools python=3.6
conda activate airflow

## set environment var and install airflow
export AIRFLOW_GPL_UNIDECODE=yes
pip install "apache-airflow[s3, postgres]"

## start airflow scheduler and webserver as daemons
airflow scheduler -D
airflow webserver -D
Boom, you’ve now got Airflow up and running. Point a browser at http://localhost:8080 and you should see the Airflow admin page.
The Airflow services (scheduler and webserver) are running with your permissions and in your user directory.
Every workflow in airflow is defined as a DAG. A DAG is a single Python file that defines the different pieces of a workflow and the order and dependency between them. For my use case I only wanted Airflow to run a single R script on my machine. For this, I created a new file in ~/jal/airflow/dags/ and I named it run_r_script.py.
The contents of that file are as follows:
# -*- coding: utf-8 -*-

from builtins import range
from datetime import timedelta
import airflow
from airflow.models import DAG
from airflow.operators.bash_operator import BashOperator
from airflow.operators.dummy_operator import DummyOperator

args = {
    'owner': 'jal',
    'start_date': airflow.utils.dates.days_ago(2),
}

dag = DAG(
    dag_id='r_etl',
    default_args=args,
    schedule_interval='* 4 * * *',
    dagrun_timeout=timedelta(minutes=20),
)

run_this = BashOperator(
    task_id='r_etl',
    bash_command='~/Documents/my_proj/r_etl.sh ',
    dag=dag,
)

run_this

if __name__ == "__main__":
    dag.cli()
There are a bunch of types of DAGs you can create in Airflow, but I just want to run an R script, so I created a BashOperator DAG. Most of what is in the DAG you can worry about understanding later. But there are two items worth noting immediately:
bash_command='~/Documents/my_proj/r_etl.sh '– this is the bash command this script executes. we’ll look at the contents next. Notice that there’s a bloody space after the name of the script but before the single quote. Yeah that HAS to be there. (Really Airflow?)schedule_interval='* 4 * * *'– this is the schedule in crontab format. I’m not well versed in crontab nomenclature, so I used https://crontab-generator.org/ to help me figure out that* 4 * * *means “run this junk at 4AM every day”
My '~/Documents/my_proj/r_etl.sh is an Rscript shell script that looks like this:
#!/usr/local/bin/Rscript

setwd('/Users/jal/Documents/my_proj/')
source('/Users/jal/Documents/my_proj/my_etl_junk.R')
Make sure you’ve run chmod +x ~/Documents/my_proj/r_etl.sh after creating the file so that it’s executable.
My file my_etl_junk.R is the script that I want to run every morning. The shell script only sets the working directory then sources my_etl_junk.R. This way I don’t have any working directory junk cluttering up my main R script.
After you add these files, then Airflow should be ready to run your job. To give it a test, click the run icon which will trigger the DAG to run immediatly:

Figure 1: Trigger DAG
If you want to see the output of your DAG, you’ll want to go into the menu bar and click Browse -> Task Instances:
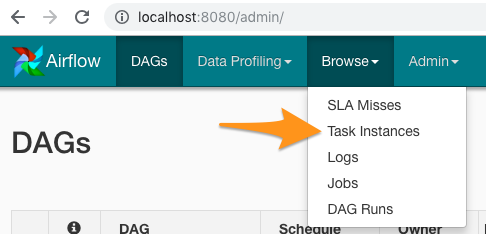
Figure 2: Airflow Browse -> Task Instances
Then look all the way to the right and there’s a link that will take you to the log output.
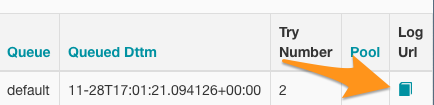
Figure 3: Airflow Log URL
In the log you should see all the output created by your R script.
If you want to start Airflow every time you log in, the easiest thing to do is create a new Automator script: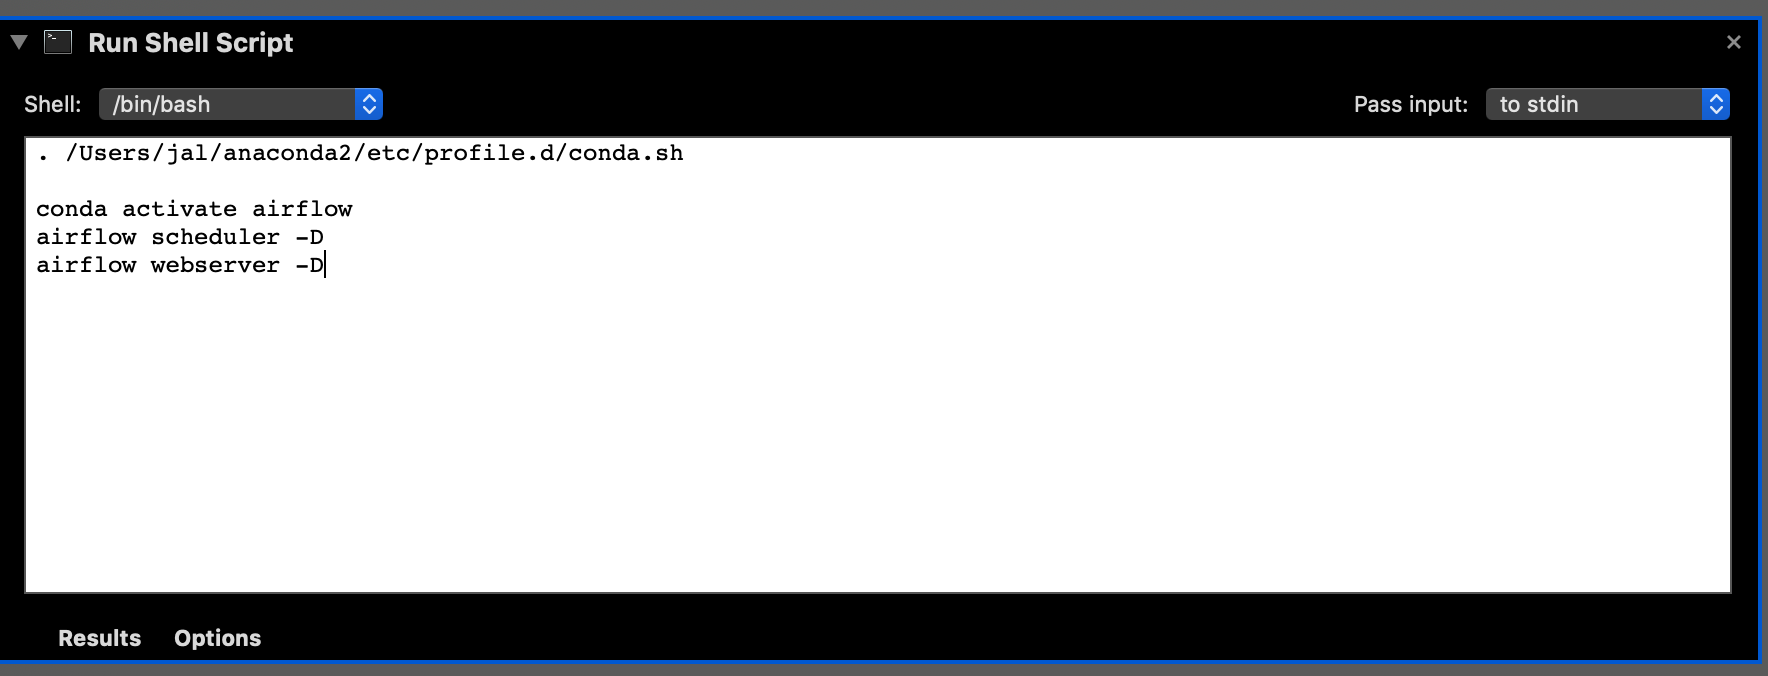
Figure 4: Automator (Run Shell Script)
The source of that script took me a minute to figure out as I had to put in a magic conda line at the beginning. Obviously you’ll need to change your userid and location of conda if it’s not in the same place as mine.
. /Users/jal/anaconda2/etc/profile.d/conda.sh

conda activate airflow
airflow scheduler -D
airflow webserver -D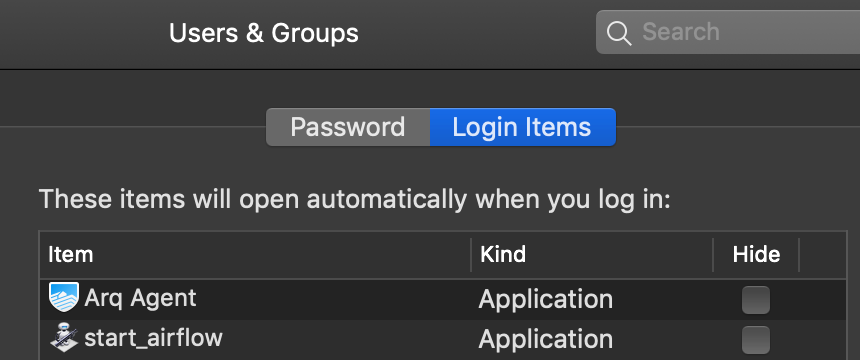
Figure 5: Trigger Script to run at every login
Have fun with Airflow!
Update on 2018-12-01
After writing about this I realized that making a shell script for each R script was really unnecessary.
What I ended up doing was creating a shell script named run_r.sh in my dags directory. I want all my R jobs to run in the directory in which they are located. So my run_r.sh looks like this:
#!/usr/local/bin/Rscript

args = commandArgs(trailingOnly=TRUE)

setwd(dirname(args[1]))
source(args[1])
As you can see, it takes one argument, the name of the R script, changes the working dir to the same directory as the R script, then sources the script.
My bash operator in my dag ends up looking like this:
run_this = BashOperator(
    task_id='my_r_thing',
    bash_command='/Users/jal/airflow/dags/run_r.sh /Users/jal/Documents/my_r_thing.R ',
    dag=dag,
)
for each of my DAGS I used the same run_r.sh and just pass them different R scripts. Don’t forget the space after the script name.